
Have you ever scrolled through beautiful artwork online and thought, “I wish I could draw”? Maybe you’ve tried before but felt frustrated when your drawings didn’t turn out as planned. Here’s the truth that most people don’t know: Drawing isn’t about talent – it’s about learning fundamental skills that anyone can practice.
As a beginner, you might be searching for:
- Simple steps to start drawing immediately
- Easy projects that build confidence
- Clear explanations of basic techniques
- Solutions to common beginner frustrations
This guide addresses exactly what you need to begin your drawing journey successfully. We’ll walk through essential techniques, provide specific exercises, and help you complete your first satisfying drawings today.
What Real Beginners Need to Know First

Talent vs. Skill: The Truth About Learning to Draw
Many aspiring artists give up because they believe they lack natural talent. However, professional artists confirm that drawing is primarily a learnable skill. The key difference between someone who “can’t draw” and someone who can is understanding fundamental techniques and consistent practice.
Your First 7 Days: What to Expect
- Days 1-2: Learning basic grips and making simple marks
- Days 3-4: Creating basic shapes and simple forms
- Days 5-7: Completing your first successful small projects
Essential Starter Kit: Budget-Friendly Supplies
You don’t need expensive materials to begin learning how to draw. Here’s what actually matters:
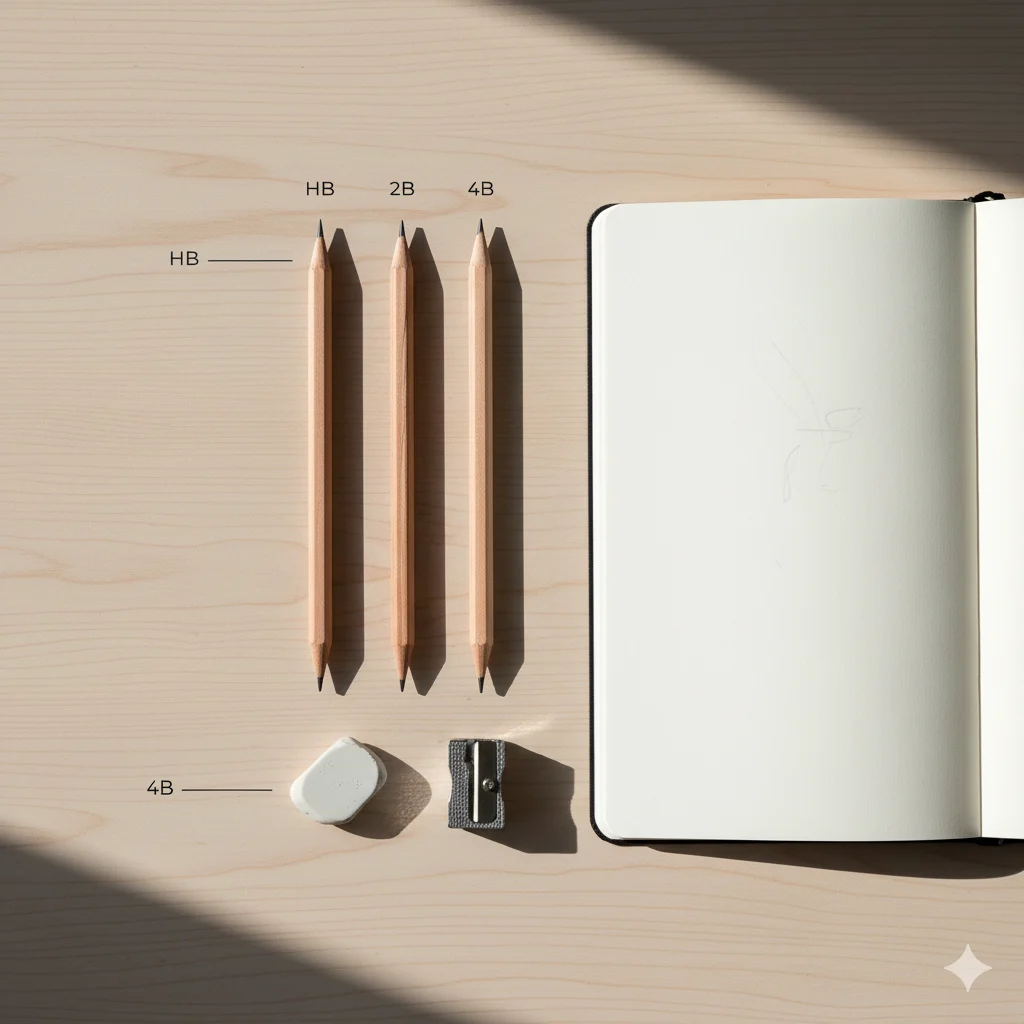
Pencils: The Only 3 You Need
- HB Pencil: Your all-purpose tool for general sketching
- 2B Pencil: Softer lead for darker lines and shading
- 4B Pencil: Perfect for rich, dark shadows
*Pro Tip: Avoid using only a standard #2 pencil – having different grades helps you create depth.*
Paper Choices Made Simple
- Practice Sessions: Printer paper or inexpensive sketchbook
- Finished Projects: Medium-weight drawing paper (80lb)
- On-the-Go: Small pocket sketchbook for daily practice
Essential Tools
- Kneaded Eraser: Can be shaped to erase tiny areas
- Standard Eraser: For completely removing marks
- Pencil Sharpener: Keep your pencils ready for detailed work
Foundational Techniques: Your Drawing “Alphabet”
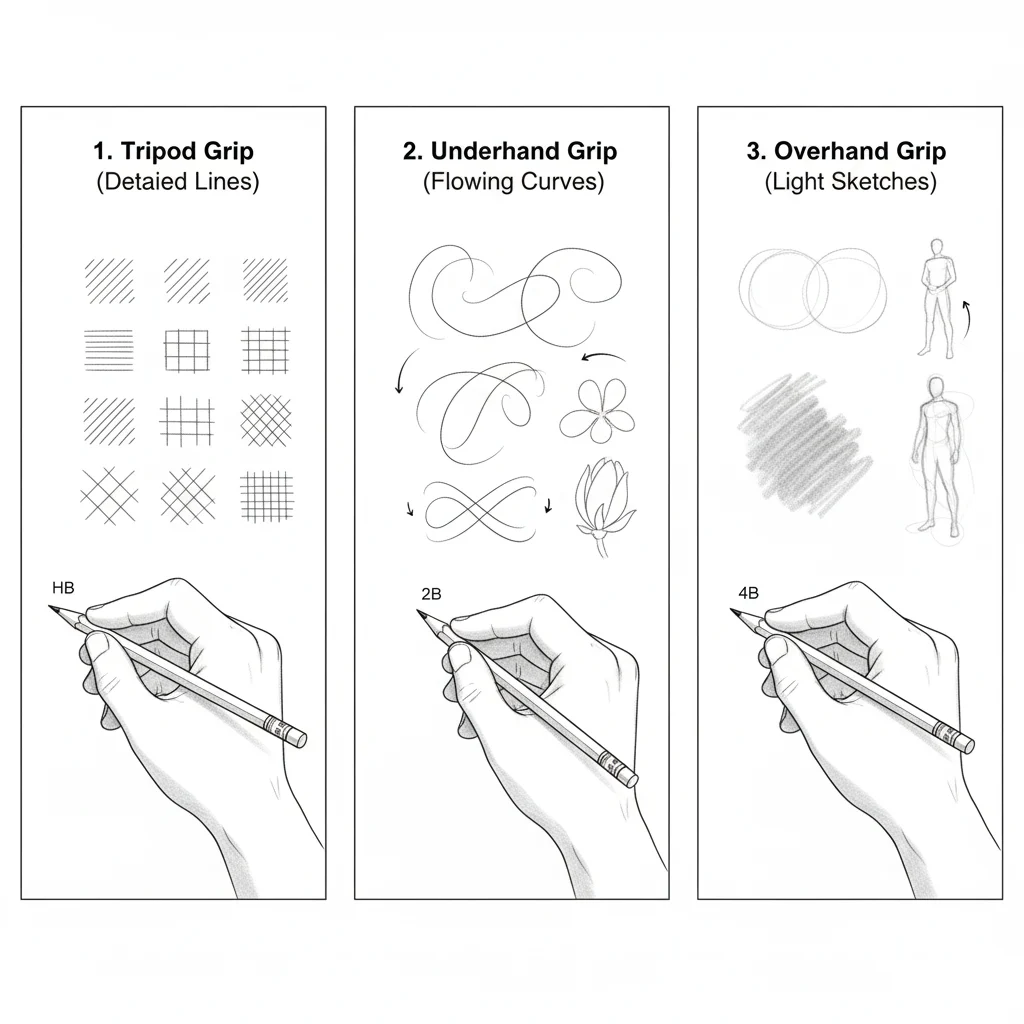
Master These 3 Pencil Grips
Different grips create different types of lines. Practice each one:
1. Writing Grip
- Hold like you’re writing
- Perfect for details and small areas
- Uses finger and wrist movements
2. Underhand Grip
- Rest the pencil against your hand
- Ideal for smooth, flowing lines
- Uses arm and shoulder movements
3. Extended Grip
- Hold the pencil farther back
- Excellent for light sketching
- Creates loose, gestural line
Alt-text: Three methods for holding a pencil for drawing – writing grip for details, underhand grip for smooth lines, and extended grip for light sketching
5 Essential Mark-Making Exercises
Practice these daily for 5 minutes each:
- Confident Lines: Draw straight lines between two points
- Control Circles: Create smooth circles of various sizes
- Pressure Practice: Make gradients from light to dark
- Shape Variations: Draw squares, triangles, and ovals
- Simple Patterns: Create textures with dots, dashes, and crosses
Your First Drawing Projects: Step-by-Step
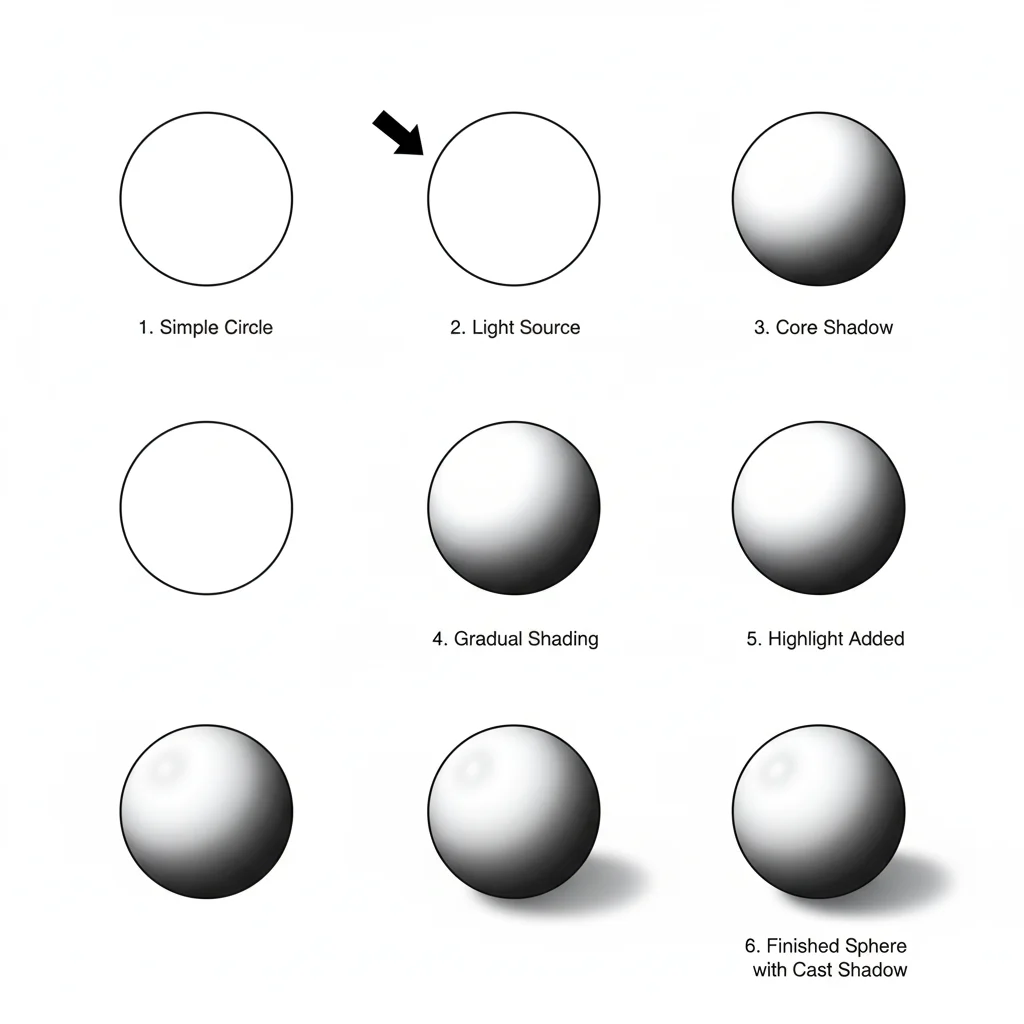
Project 1: Simple 3D Sphere
Perfect for understanding light and shadow
Step-by-Step Instructions:
- Lightly sketch a circle using the underhand grip
- Imagine your light source (top left corner)
- Add core shadow opposite the light source
- Blend from dark to light gradually
- Leave a bright highlight where light hits directly
- Add a soft cast shadow on the “ground”
*Alt-text: Six steps to draw a 3D sphere from basic circle to fully shaded form with highlight and shadow*
Project 2: Friendly Cartoon Cup
Builds confidence with simple shapes
Step-by-Step Instructions:
- Draw a flat oval for the cup opening
- Add curved lines down for sides
- Create a U-shape for the base
- Draw a simple handle
- Add a happy face (optional but fun!)
- Include simple shading on one side
Common Beginner Problems – Solved!
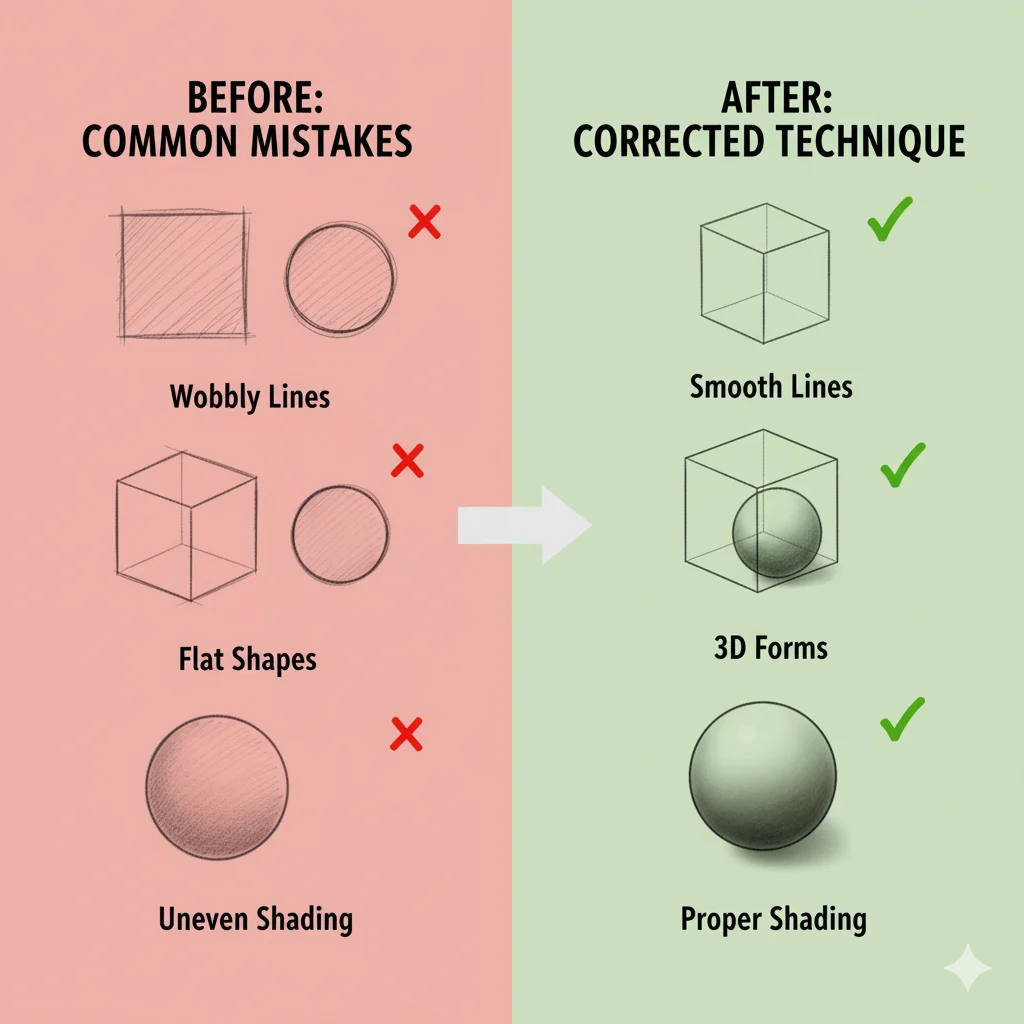
“My Lines Are Wobbly”
Solution: Practice “ghost lines” – hover your pencil over the paper several times before making the final mark. Draw from your elbow, not your wrist.
“My Drawings Look Flat”
Solution: Focus on these three elements:
- Light Source: Always identify where light comes from
- Shadows: Include core shadow and cast shadow
- Highlights: Leave areas untouched for bright spots
“I Don’t Know What to Draw”
Start with these easy subjects:
- A piece of fruit (apple or banana)
- Your coffee mug
- A simple houseplant
- Basic geometric objects
Building a Sustainable Drawing Habit
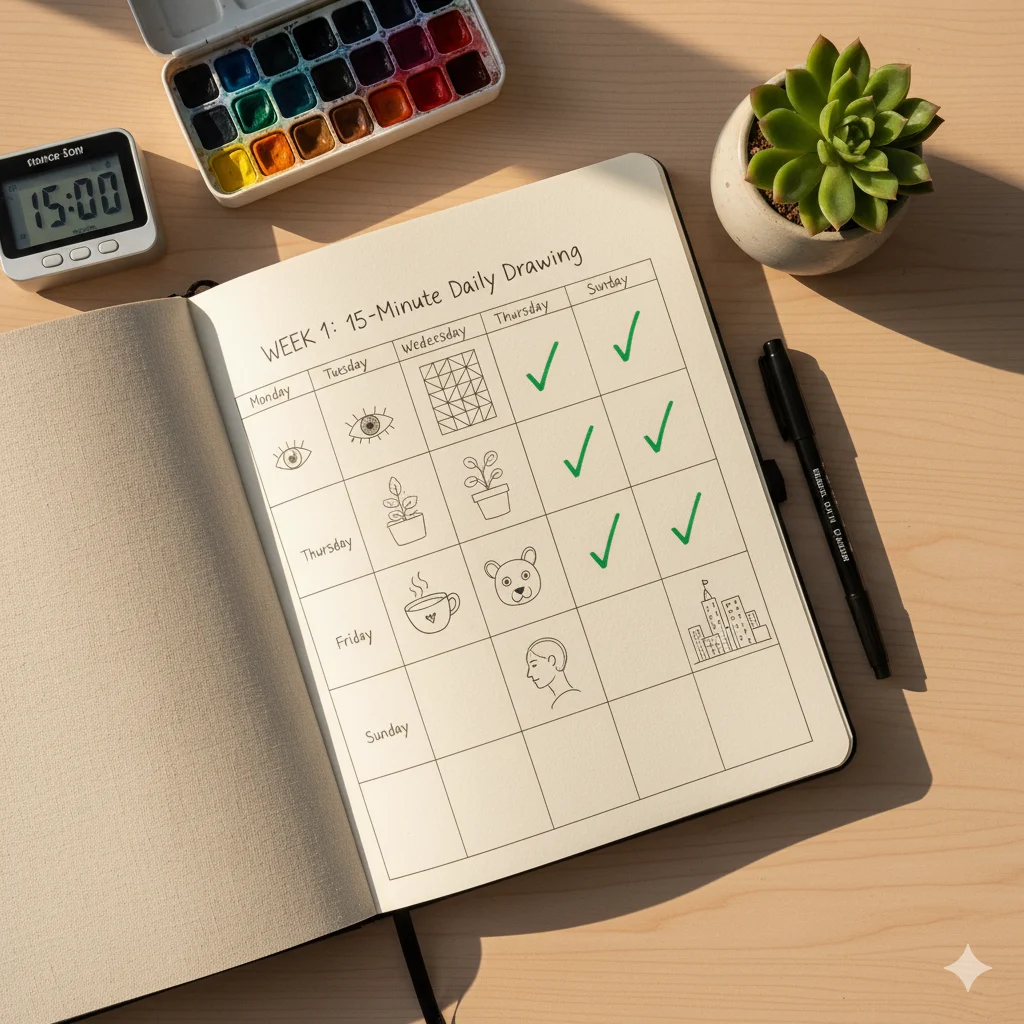
The 15-Minute Daily Practice
Consistent short practices beat occasional long sessions. Try this schedule:
- Monday: Line and shape exercises (5 min) + Sphere practice (10 min)
- Tuesday: Basic object sketching (15 min)
- Wednesday: Shading practice (15 min)
- Thursday: Copy a simple image (15 min)
- Friday: Free drawing – anything you want (15 min)
- Weekend: Rest or enjoy extra drawing time
Track Your Progress
Keep a simple log:
- Date and practice time
- What you worked on
- One thing you improved
- One thing to practice next time
Digital Drawing: A Quick Start Guide

Many beginners wonder about digital options. Here’s what you need to know:
Getting Started Digitally
- Budget Option: Smartphone with free drawing app
- Tablet Options: Basic drawing tablets start under $100
- Software: Free programs like Krita or inexpensive apps like Procreate
Digital vs. Traditional
- Digital Advantages: Easy undo, layers, endless colors
- Traditional Advantages: Tactile feedback, no charging needed, portable
Frequently Asked Questions
Q: How long until I see improvement?
A: Most beginners notice clear improvement within 2-3 weeks of consistent practice. The key is regular practice rather than perfect drawings.
Q: Is tracing okay for beginners?
A: Yes! Tracing helps understand shapes and proportions. Use it as a learning tool, not a crutch.
Q: What’s the most important skill to practice?
A: Learning to see shapes and relationships between objects. Practice breaking complex subjects into simple forms.
Q: How do I draw people and faces?
A: Start with basic proportions: heads are oval shapes, eyes are in the middle of the head. We have a complete face drawing guide available.
Next Steps in Your Drawing Journey
Ready to continue progressing? Here are your natural next steps:
- Practice the fundamentals daily – they’re the foundation of all drawing
- Try our “Draw 30 Easy Objects” challenge – build consistency and skill
- Explore different subjects – animals, landscapes, still life
- Join our beginner drawing community for support and feedback
Free Download: Beginner’s Practice Sheets
Download our free PDF practice pack including:
- Shape and line exercises
- Simple project templates
- 30-day drawing prompt list
- Progress tracking worksheet
[Download Your Free Practice Sheets Here]
Conclusion: Your Drawing Journey Starts Now
Remember that every artist began exactly where you are now. The drawings you create today are the first steps toward the artwork you’ll create tomorrow. What matters isn’t perfection but consistent practice and celebrating small victories.
Your assignment for today: Gather your pencils and complete the sphere project. Then try the cartoon cup. You’ll be amazed at what you can create with basic techniques.