Quick Emergency Help:
- 🚨 School Chromebook? Try Ctrl + Shift + Show Windows – some admins only block full-screen captures
- 🔍 Can’t Find Screenshot? Check Files app > Downloads AND search “Screenshot” in Launcher
- ⌨️ Shortcut Not Working? Some models use Ctrl + F5 instead of Show Windows
- 📜 Need Scrolling Capture? Install “GoFullPage” extension from Chrome Web Store
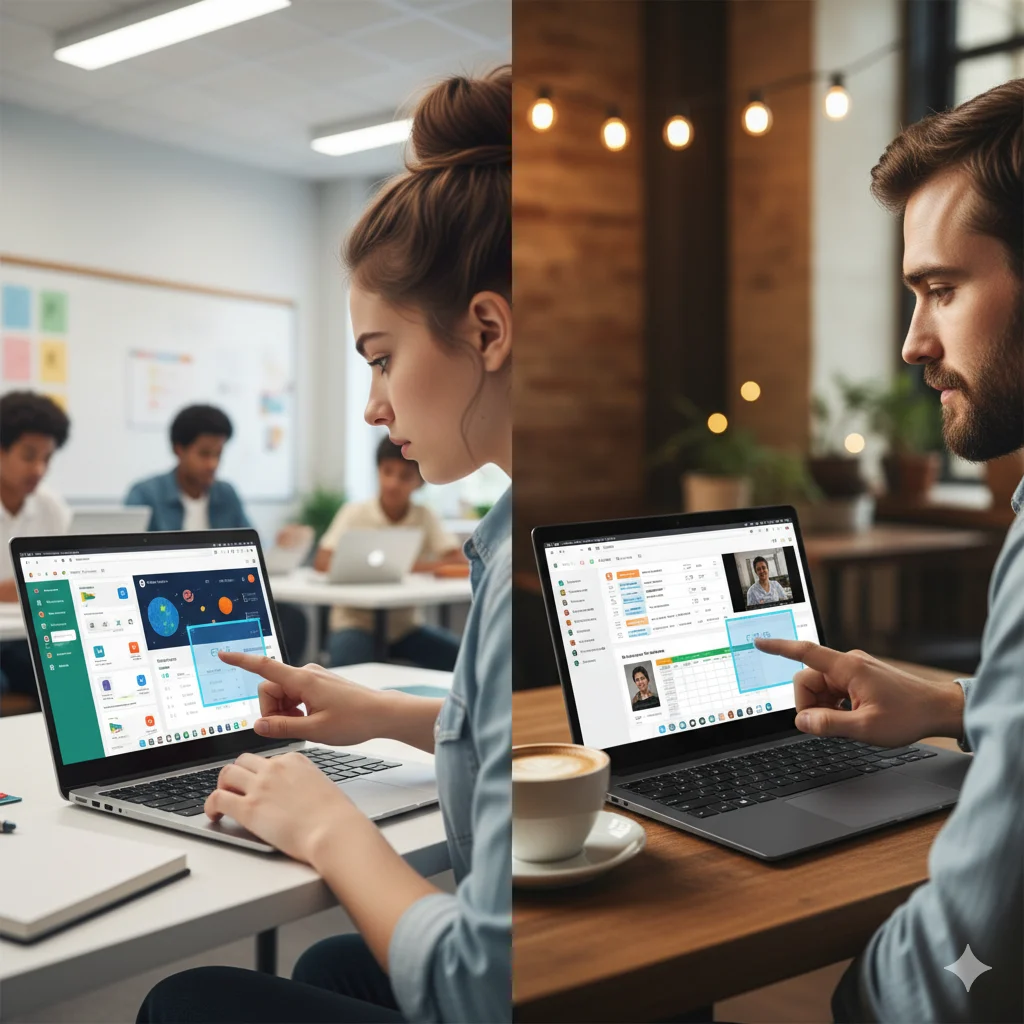
If you’re struggling to take screenshots on your Chromebook, you’re not alone. Many users get frustrated when the familiar “Print Screen” key is missing, or when school-administered devices block certain functions.
Here’s what most guides don’t tell you: Chromebooks have more screenshot options than Windows or Mac, including built-in editing and instant sharing features. This guide not only shows you every method but also provides solutions for the most common Chromebook screenshot problems.
Chromebook Screenshot Methods: Which One Should You Use?
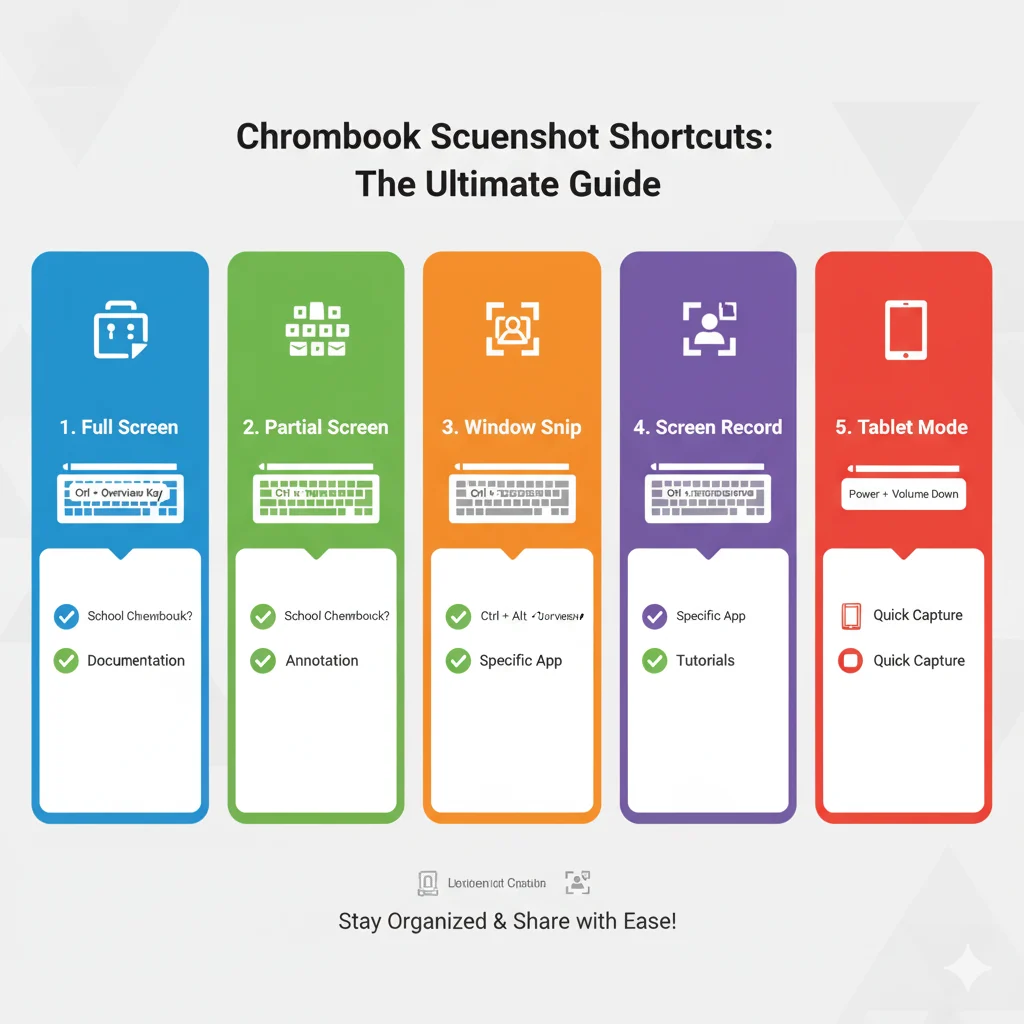
| Method | Shortcut | Best For | School Chromebook? |
|---|---|---|---|
| Full Screen | Ctrl + Show Windows | Quick entire screen | Often blocked |
| Partial Screenshot | Ctrl + Shift + Show Windows | Specific areas | Usually works |
| Screen Capture Tool | Shift + Ctrl + Show Windows | Editing & recording | Sometimes available |
| Tablet Mode | Power + Volume Down | Touchscreen devices | Depends on settings |
| Scrolling Capture | GoFullPage extension | Entire webpages | Often works |
The “Show Windows” key (⎙) looks like a rectangle with two lines. On some keyboards, it’s labeled as “Overview” key or appears where F5 would be.
Method 1: Full Screen Screenshot (When You Need Everything)
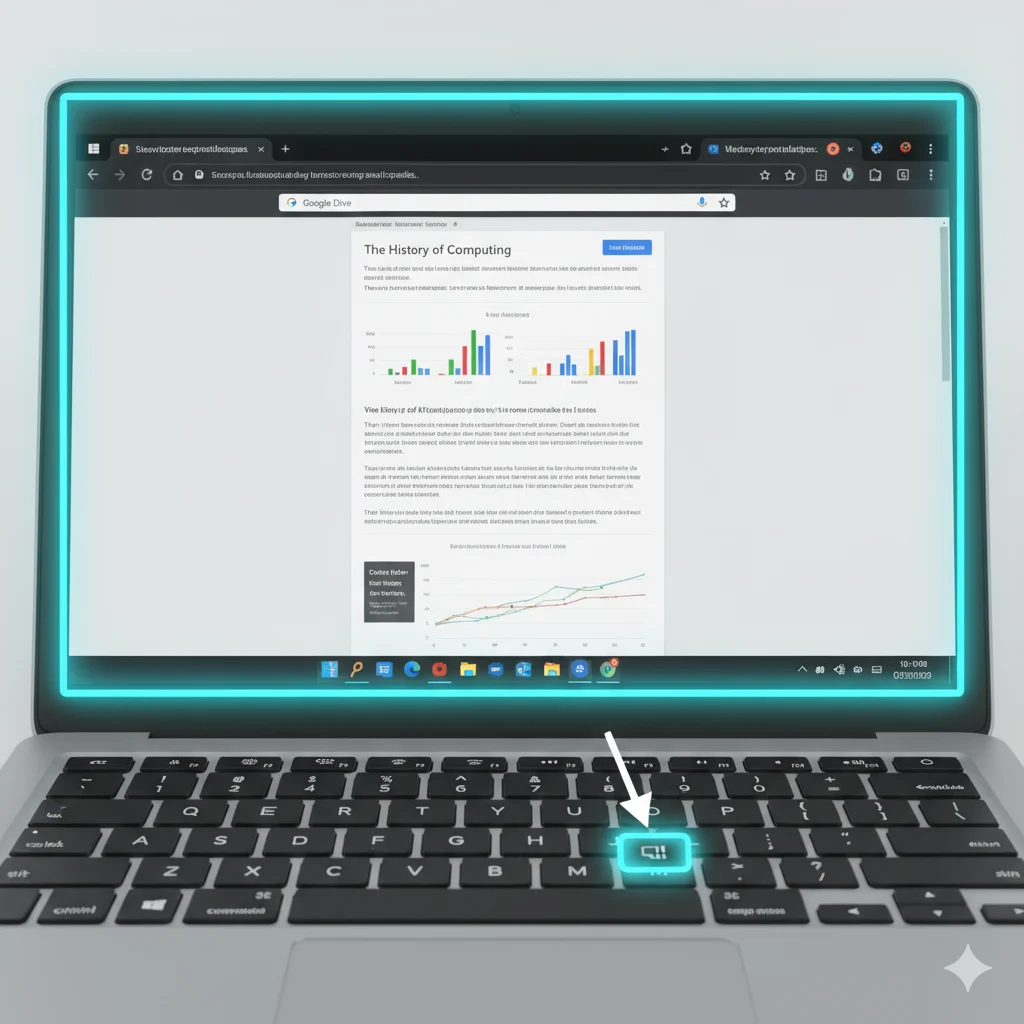
Step-by-Step Instructions:
- Prepare Your Screen: Close unnecessary tabs and windows
- Press Shortcut: Ctrl + Show Windows keys together
- Watch for Confirmation: Screen will flash white briefly
- Access Screenshot: Click notification OR check Files app > Downloads
School Chromebook Users: If this doesn’t work, your administrator may have disabled full-screen captures. Skip to Method 2.
Alt-text: Chromebook keyboard showing Ctrl and Show Windows keys highlighted for full-screen screenshot shortcut
Method 2: Partial Screenshot (Works on Most School Chromebooks)
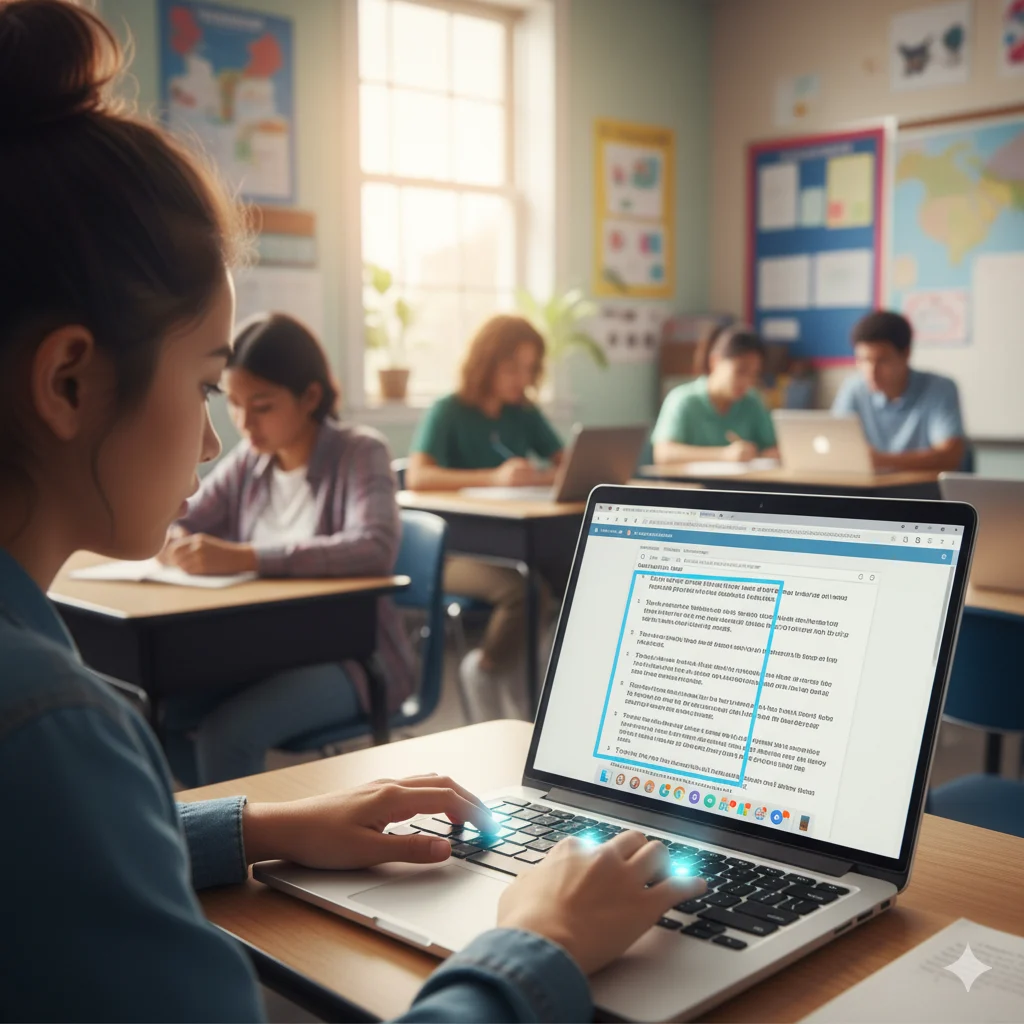
This is the most reliable method for educational and managed devices.
Step-by-Step Instructions:
- Press Shortcut: Ctrl + Shift + Show Windows simultaneously
- Select Area: Screen dims – click and drag to select rectangle
- Pro Techniques:
- Hold Shift for perfect square
- Hold Spacebar to move selection
- Press Escape to cancel
- Release to capture
- Edit Immediately: Click notification to annotate or blur sensitive info
Why This Works on School Devices: Administrators often disable full-screen captures for privacy but allow selective captures for educational purposes.
Method 3: Screen Capture Tool (For Editing & Recording)
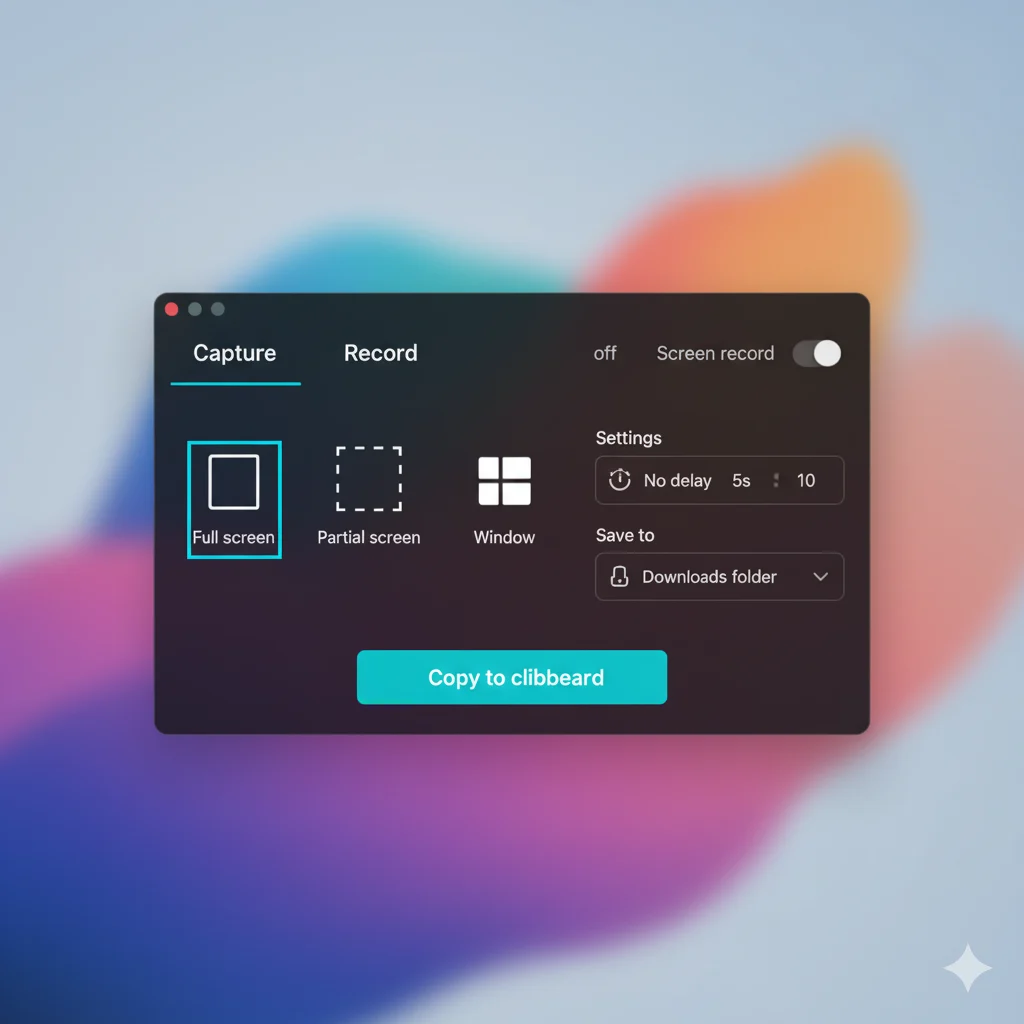
Access Instructions:
Option A – Keyboard: Press Shift + Ctrl + Show Windows
Option B – Settings: Click system tray > Settings > Advanced > Accessibility > Keyboard > Screen Capture
Features Breakdown:
- Capture Modes:
- Fullscreen (may be blocked on school devices)
- Region (usually works)
- Window (captures specific application)
- Recording Option: Switch to “Screen Record” for video captures
- Copy to Clipboard: Bypass file saving for quick pasting
- Timer: 3-second delay for capturing menus
Alt-text: Chrome OS Screen Capture Tool showing screenshot and screen recording options with timer settings
Method 4: Scrolling Screenshots (For Entire Webpages)

Since Chromebooks don’t have built-in scrolling capture, here’s how to do it:
Using GoFullPage Extension:
- Install: Chrome Web Store > Search “GoFullPage” > Add to Chrome
- Capture: Click extension icon in toolbar
- Edit: Use built-in tools to annotate or crop
- Export: Save as PNG or PDF, or copy to clipboard
Why This Works on Managed Devices: Most school IT departments allow educational extensions from Chrome Web Store.
Alternative Method for Long Content:
- Take multiple partial screenshots
- Use built-in editor to stitch together
- Save as combined image
Method 5: Tablet & Touchscreen Mode

For Convertible Chromebooks:
- Switch to Tablet Mode: Detach keyboard or fold back
- Press Buttons: Power + Volume Down simultaneously
- Hold for 1-2 seconds until screen flashes
- Access: Find in Files app > Downloads
Note: Some older models use Power + Volume Up
Troubleshooting: School Chromebook & Common Problems
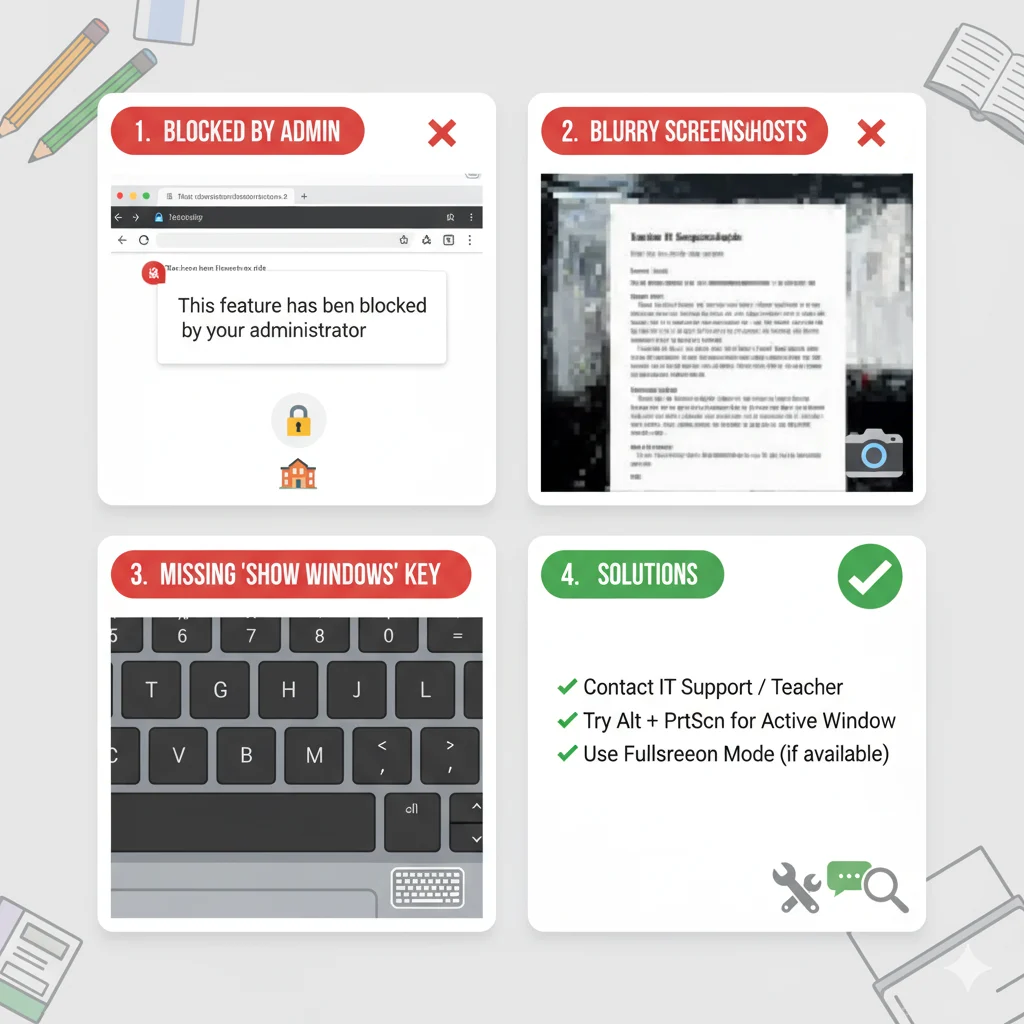
Problem: “Screenshot Blocked by Administrator”
Solutions to Try:
- Use Partial Screenshot (Ctrl + Shift + Show Windows)
- Install GoFullPage Extension for web content
- Use Smartphone Camera as last resort
- Request Permission from IT department for educational needs
Problem: Shortcuts Not Working
Device-Specific Solutions:
- Acer/Samsung Chromebooks: Try Ctrl + F5
- External Keyboards: Use Ctrl + F5
- Lenovo Chromebooks: Check for “Overview” key instead of Show Windows
- All Models: Update Chrome OS (Settings > About Chrome OS)
Problem: Can’t Find Screenshots
Search These Locations:
- Primary: Files app > Downloads folder
- School Accounts: Google Drive > specific class folder
- Search: Launcher key + type “Screenshot”
- Recent: Files app > Recent files
Problem: Screenshots Blurry or Poor Quality
Fix Settings:
- Browser Zoom: Ensure 100% zoom level
- Display Settings: Settings > Device > Displays > Native resolution
- High DPI: Adjust display scaling if text is too small
- File Format: Chromebooks use PNG (better quality than JPG)
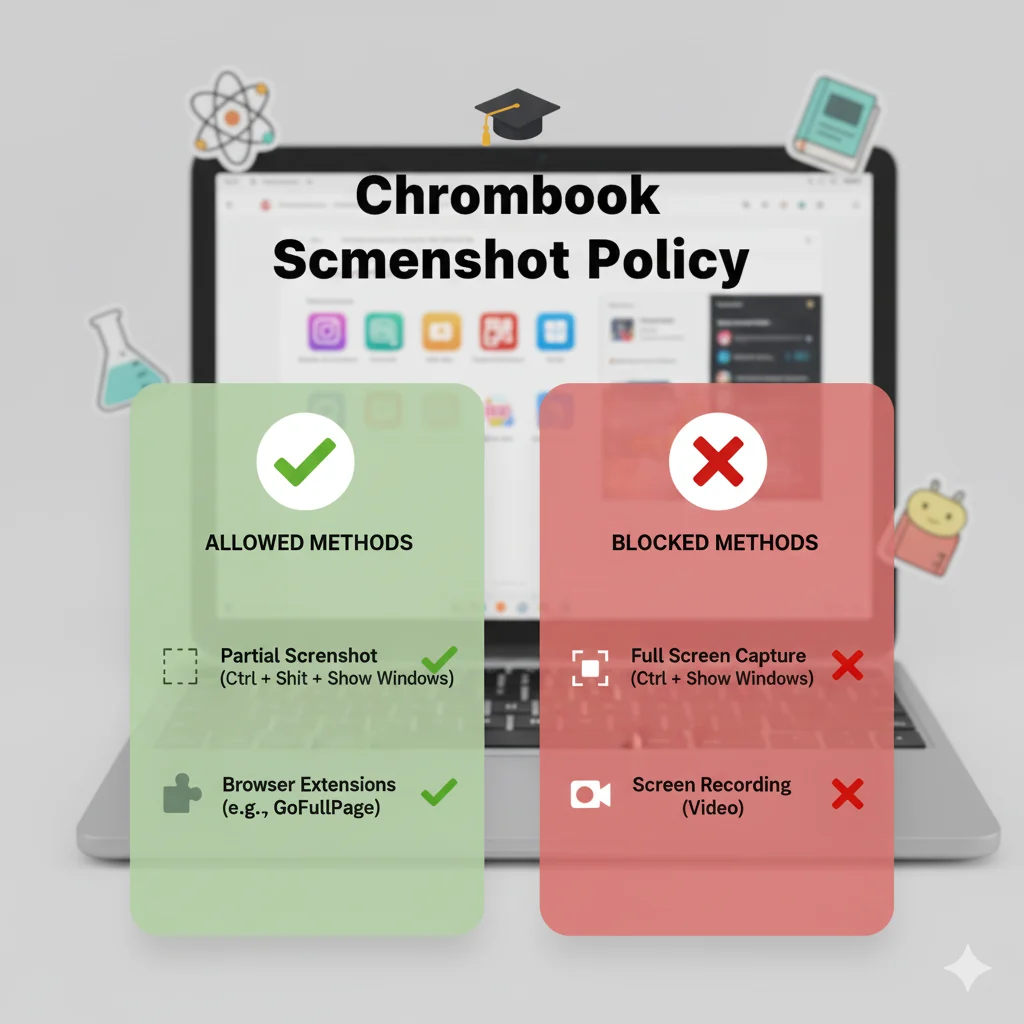
School Chromebook Specific Guide
What Typically Works:
- ✅ Partial screenshots (Ctrl + Shift + Show Windows)
- ✅ GoFullPage extension for webpages
- ✅ Tablet mode screenshots
- ✅ Screen Capture Tool (region mode)
What’s Often Blocked:
- ❌ Full-screen screenshots
- ❌ Screen recording
- ❌ Some editing features
Educational Use Cases:
- Research: Capture web content with GoFullPage
- Assignments: Partial screenshots for evidence
- Collaboration: Share to Google Classroom directly
- Organization: Save to subject-specific folders
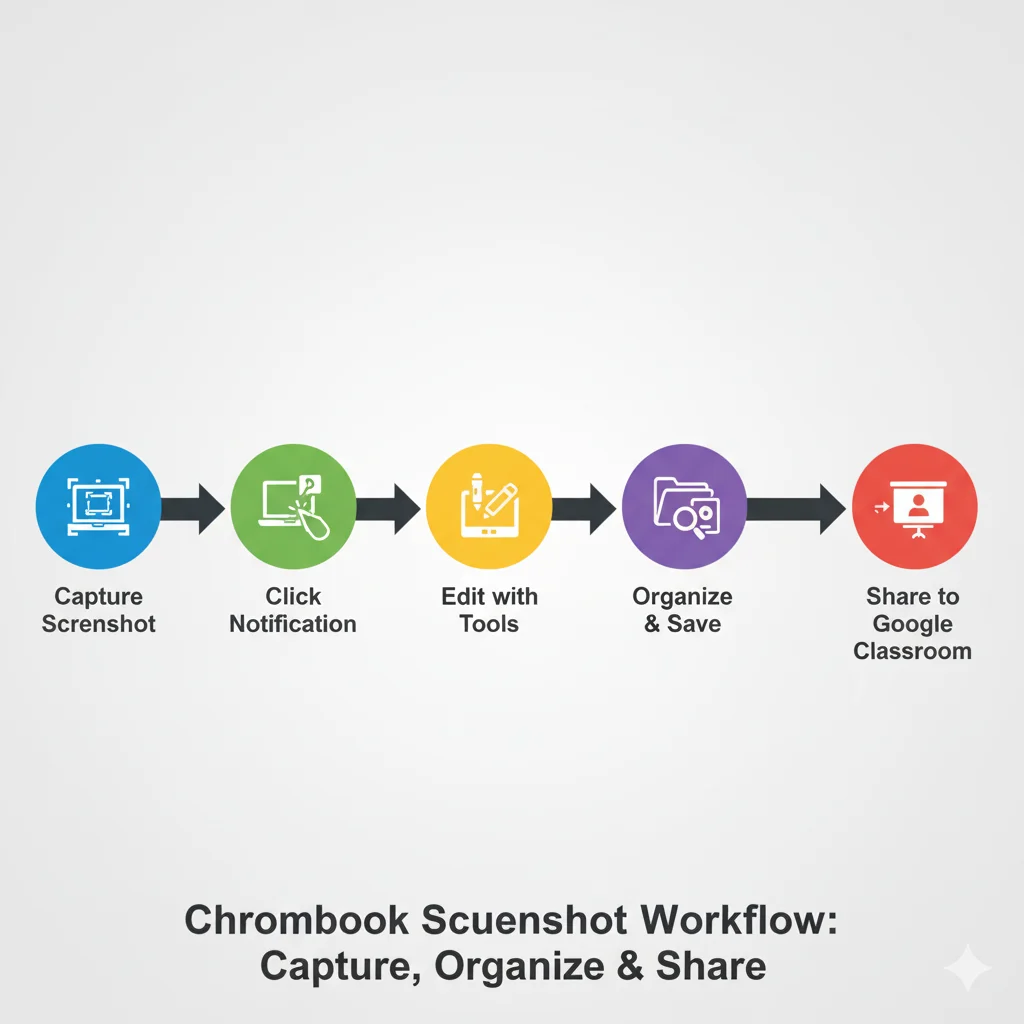
Advanced Organization & Workflow
Create Efficient System:
- Folder Structure:textGoogle Drive/ └── Screenshots/ ├── School/ │ ├── Math/ │ ├── Science/ │ └── English/ └── Personal/
- Naming Convention: “Subject_Topic_Date.png”
- Quick Sharing:
- Click screenshot notification
- Share icon > Google Classroom/Gmail
- Set sharing permissions if using Google Drive
Built-in Editing Workflow:
- Immediate Editing: Click notification after capture
- Tools Available: Crop, draw, text, blur, highlight
- Save Options: New file or overwrite original
- Quick Annotations: Use for highlighting key information
Free Download: School Chromebook Screenshot Kit
Download Our Printable Resources:
- School-approved methods checklist
- Keyboard shortcut stickers (printable)
- File organization template
- IT request template for screenshot access
[Download School Chromebook Screenshot Kit]
Frequently Asked Questions (FAQ)
Q: Why is screenshot completely blocked on my school Chromebook?
A: Some districts disable all screenshot functions. Try these workarounds:
- Use your smartphone camera
- Ask teacher to share materials directly
- Use “Request Access” from IT department
Q: How can I take a screenshot without the Show Windows key?
A: On devices without this key, use:
- Ctrl + F5 (most common alternative)
- On-screen keyboard (Settings > Accessibility)
- Tablet mode buttons (Power + Volume Down)
Q: Can teachers see my screenshots on a school Chromebook?
A: They can see files saved to your school Google Drive, but not local Downloads folder. Always assume school devices are monitored.
Q: How do I record my screen on a school Chromebook?
A: Most schools block recording. Ask your teacher about alternative approved tools like Loom or Screencastify.
Q: Why are my screenshots saving to Google Drive instead of Downloads?
A: Check your Chrome OS settings: Settings > Advanced > Downloads > Location. Your school may have set Drive as default.
Conclusion: Mastering Chromebook Screenshots
For Regular Users:
- Start with: Ctrl + Shift + Show Windows (partial screenshot)
- For webpages: Install GoFullPage extension
- For editing: Use built-in editor after capture
For School Chromebook Users:
- Primary Method: Partial screenshots (usually work)
- Secondary Method: GoFullPage extension
- Last Resort: Smartphone camera for critical content
Your Action Plan:
- Today: Practice partial screenshot shortcut 5 times
- This Week: Install GoFullPage extension and test it
- This Month: Set up organized folder system in Google Drive
Still stuck? Comment below with your specific Chromebook model and what happens when you try these methods. Our community includes IT professionals and experienced Chromebook users who can help!
Need more school tech help? Check out our guides on [Google Classroom tips] and [Chromebook keyboard shortcuts every student needs].

Mariah Cannon is the creative mind behind Pikuplab.com, crafting engaging, high-ranking content with expertise and precision.
With a talent for turning ideas into impactful words, Mariah brings value to every article.