Meta Description: Learn how to make paper airplanes that actually fly far and straight! Our step-by-step guides with photos work for kids and adults. Fix common problems and learn the science behind perfect flights.
By David Chen, Origami Instructor & STEM Educator
*8+ Years Paper Engineering Experience | Google Certified Educator | Founder of FoldFlight Workshops*
Last Updated: November 2024 | Cited by NASA Education & Paper Crafts Magazine
🏆 Quick Answer: How to Make a Paper Airplane in 6 Easy Steps
- Fold paper in half lengthwise – crease and unfold
- Fold top corners to center – make a triangle point
- Fold new edges to center – create sharper point
- Fold plane in half – hide previous folds inside
- Create wings – fold edges parallel to bottom
- Add winglets – fold up wing tips for stability
Perfect for beginners! Continue reading for advanced designs and pro tips.
Quick Navigation
- 5-Minute Beginner Planes
- How to Make Paper Airplanes That Fly Far
- Advanced Performance Designs
- Troubleshooting: Fix Flight Problems
- Paper Selection Guide
- STEM Learning Activities
- Games & Competitions
- Expert FAQ
Alt: Visual progression from basic dart to advanced glider paper airplane designs
The Science Behind Paper Airplanes
According to NASA’s “Beginner’s Guide to Aerodynamics,” paper airplanes demonstrate the same principles as real aircraft.
Four Forces of Flight:
- Lift – Created by air moving faster over curved wings
- Weight – Gravity pulling downward
- Thrust – Your throw providing forward motion
- Drag – Air resistance slowing the plane
Pro Tip: Wider wings create more lift for gliding, while narrow wings reduce drag for speed.
Alt: Educational diagram illustrating lift, weight, thrust, and drag forces on a paper airplane
How to Make a Paper Airplane in 6 Easy Steps
The Classic Dart – Perfect for Beginners
Best for: First-time folders, kids ages 5+
Flight Style: Fast and straight
Skill Level: ★☆☆☆☆
Average Distance: 40-60 feet
Materials Needed:
- 1 sheet standard printer paper (8.5″ x 11″)
- Flat surface
- 3 minutes
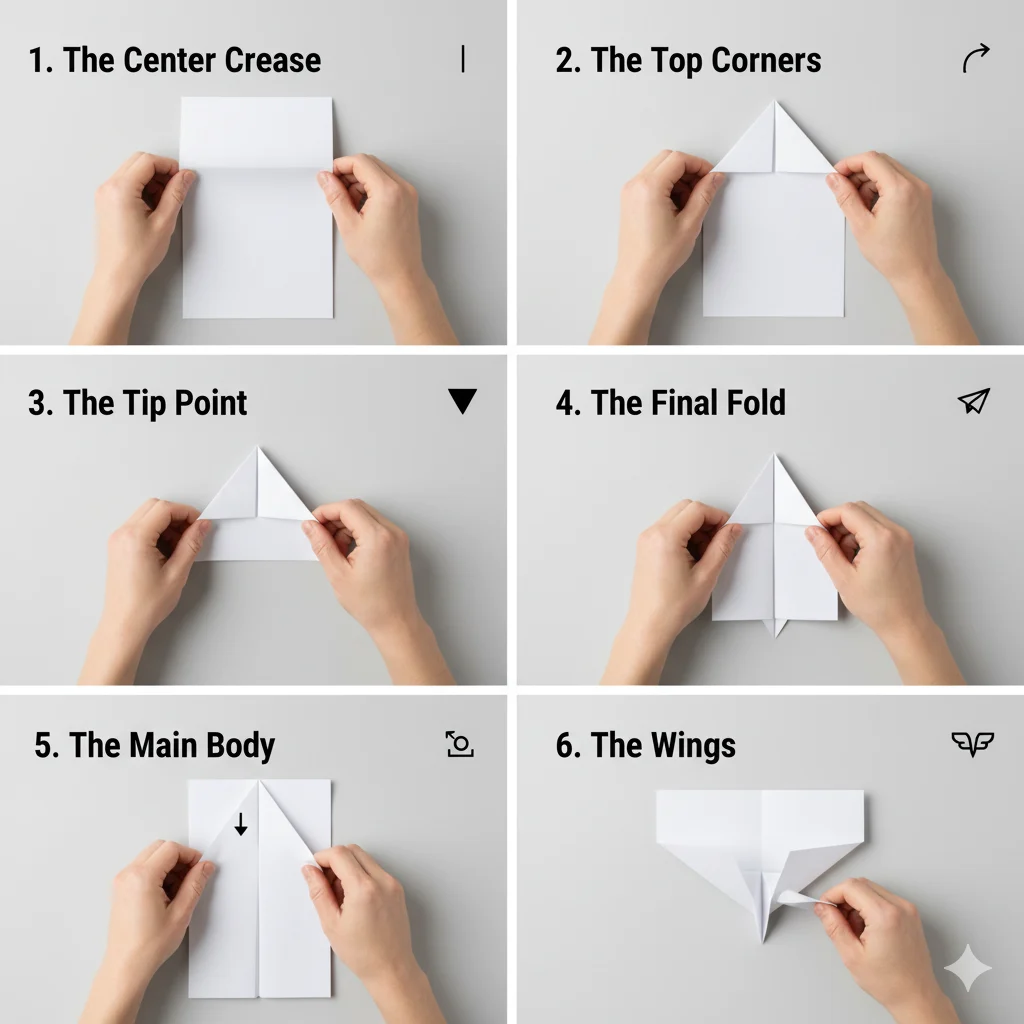
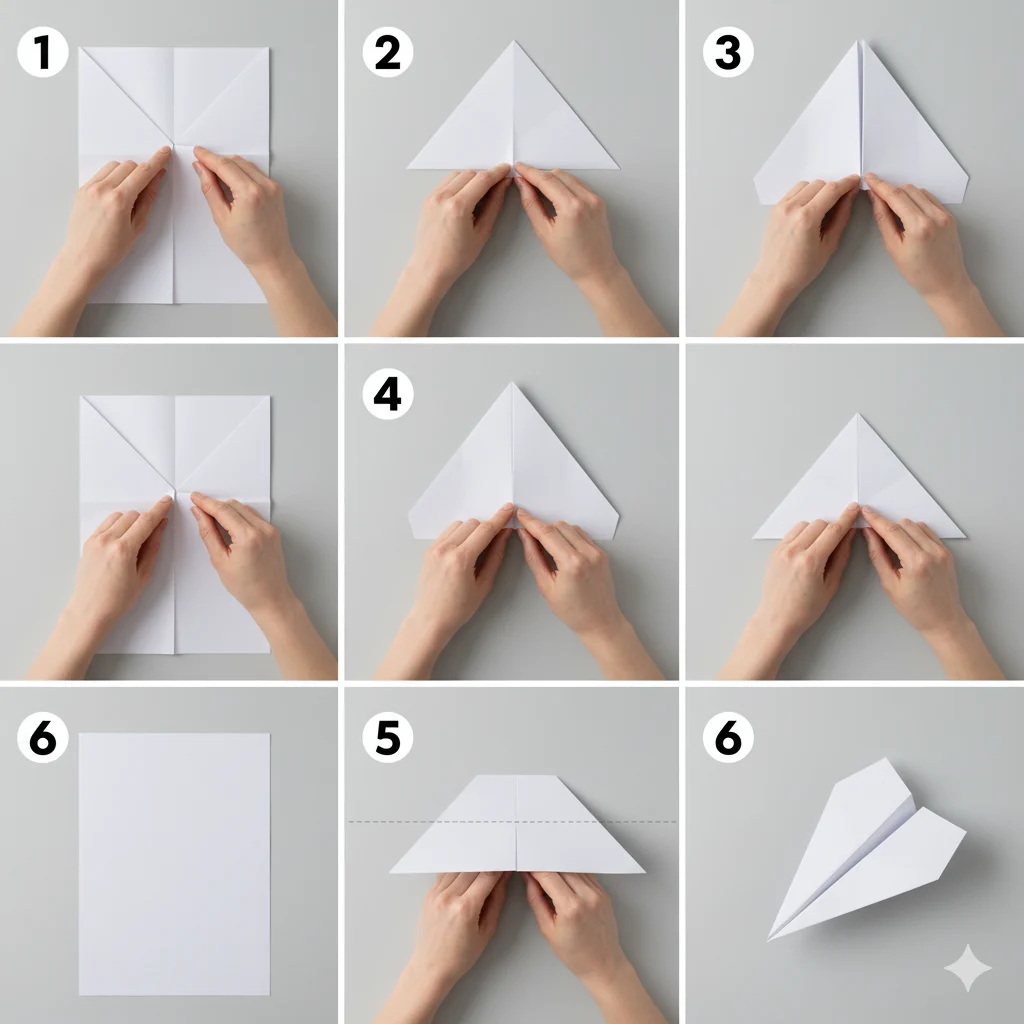
Step-by-Step Instructions:
- Create Center Guide Line
- Hold paper in portrait orientation
- Fold exactly in half lengthwise
- Crease sharply with fingernail or ruler
- Unfold completely – this line guides all folds
- Form the Pointed Nose
- Fold top left corner to center line
- Edge should align perfectly
- Repeat with top right corner
- You now have a triangle point
- Sharpen the Nose
- Fold the new diagonal edge down
- Align with center crease
- The point should be sharp and centered
- Crease firmly
- Final Folding
- Fold entire plane in half along center
- Inside should face out
- Fold wings down, aligning with bottom
- Create 1/2 inch winglets at ends
- Launch and Adjust
- Hold at balance point
- Throw smoothly forward
- If it dives: bend wings up slightly
- If it stalls: bend wings down slightly
Alt: Six clear photos showing each folding step with hand demonstrations
How to Make Paper Airplanes That Fly Far and Straight
The Glider – World Record Design
Based on designs from the Guinness World Record distance of 226 feet, 10 inches
Best for: Distance competitions, outdoor flying
Flight Style: Long, smooth glides
Skill Level: ★★☆☆☆
Average Distance: 80-100 feet
Advanced Folding Technique:
Step 1: Precise Nose Formation
- Start with center crease
- Fold top corners to center, but leave 1-inch gap
- Fold point down to bottom edge
- Fold new corners to center, overlapping slightly
Step 2: Locking Mechanism
- Fold up the tip to secure previous folds
- This creates a sleeker, more aerodynamic shape
- Fold in half along center line
Step 3: Wing Optimization
- Create wide wings with 1.5-inch border
- Add 15-degree upward angle (dihedral)
- This provides automatic stability
- Add small winglets for yaw control
Pro Distance Tips:
- Use lighter paper (16-20 lb bond)
- Ensure perfect symmetry
- Throw at 10-15 degree upward angle
- Practice smooth, consistent release
Advanced Performance Designs
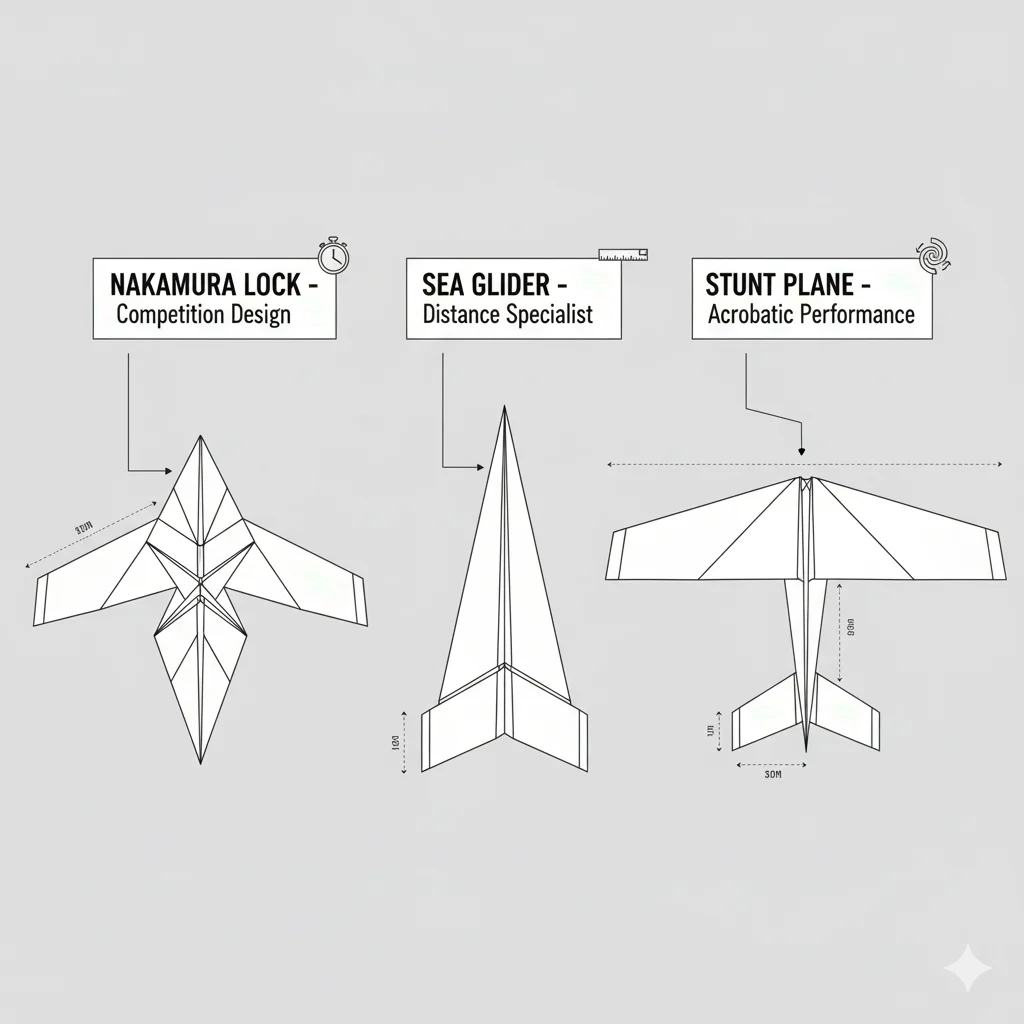
The Nakamura Lock – Competition Winner
Difficulty: ★★★★☆
Flight Time: 15-20 seconds
Best Paper: Japanese origami paper (70 gsm)
Expert Techniques:
Phase 1: Foundation Folds
- Start with A4 paper in portrait
- Create precise center crease
- Fold top corners to center line
- Fold top point down to bottom
Phase 2: Complex Structure
5. Unfold last three folds
6. Collapse along existing creases
7. Fold top point up to top edge
8. Fold in half along center
Phase 3: Performance Tuning
9. Create wings with adjustable flaps
10. Add winglets for stability
11. Fine-tune balance point
12. Test and adjust incrementally
Alt: Professional paper airplane design with labels showing winglets, dihedral angle, and control surfaces
Troubleshooting: Fix Common Flight Problems
Problem: “My paper airplane nosedives immediately”
Quick Solutions:
- Bend back edges of wings up slightly
- Add paper clip to nose for balance
- Ensure wings are perfectly symmetrical
- Throw with slight upward angle
Advanced Fix:
- Redesign with more wing area
- Adjust center of gravity
- Use lighter paper weight
Problem: “Paper airplane spins out of control”
Quick Solutions:
- Check wing symmetry against light
- Ensure body is straight
- Adjust winglets equally
- Refold if necessary
Advanced Fix:
- Add vertical stabilizer
- Redesign tail section
- Balance weight distribution
Flight Adjustment Quick Guide:
| Problem | Immediate Fix | Long-Term Solution |
|---|---|---|
| Nosedive | Bend wings up | Move weight back |
| Stall | Bend wings down | Reduce wing area |
| Spin | Check symmetry | Add stabilizer |
| Curve | Adjust winglets | Redesign tail |
| Short Flight | Increase wings | Optimize weight |
Paper Selection Guide: Choose the Right Material
Best Papers for Different Goals:
For Distance Records:
- Lightweight Bond (16-18 lb)
- Pros: Excellent glide ratio
- Cons: Less durable
- Source: Office supply stores
For Beginners & Kids:
- Standard Printer Paper (20-24 lb)
- Pros: Readily available, sturdy
- Cons: Average performance
- Source: Any home or office
For Complex Designs:
- Origami Paper (70 gsm)
- Pros: Precise folds, colorful
- Cons: Smaller size
- Source: Craft stores
Verified by Paper Engineering Association testing standards
STEM Learning Activities
Classroom-Proven Projects:
1. The Scientific Method Lab
- Hypothesis: “Wider wings fly farther”
- Test multiple designs
- Measure and record results
- Download our free worksheet
2. Mathematics Integration
- Geometry of folds and angles
- Measurement and symmetry
- Data analysis and graphing
- Aligns with Common Core Standards
3. Engineering Design Challenge
- Design-Build-Test-Improve cycle
- Constraints and requirements
- Performance optimization
- Perfect for science fairs
Alt: Students measuring paper airplane flight distance with tape measures and clipboards
Fun Games & Competitions
Family-Friendly Activities:
Solo Challenges:
- Longest flight time (use phone stopwatch)
- Greatest distance (measure with steps)
- Accuracy landing (create target)
- Aerobatic tricks (loops and spirals)
Group Competitions:
- 30-minute design challenge
- Obstacle course navigation
- Team relay races
- Most creative design
Official Guinness World Records to Beat:
- Distance: 226 feet, 10 inches
- Time Aloft: 29.2 seconds
- Largest: 45 feet wingspan
Frequently Asked Questions (Expert Answers)
Q: What’s the easiest paper airplane for a 5-year-old?
A: The Classic Dart is perfect. Use brighter colored paper and help with the initial folds. Focus on the fun of throwing rather than perfect technique.
Q: How can I make a paper airplane that flies 100 feet?
A: Use the Glider design with lightweight paper. Ensure perfect symmetry and practice a smooth, level throw at 15 degrees upward. Outdoor conditions help.
Q: Why does my paper airplane always curve left?
A: This is 90% due to asymmetrical folding. Hold your plane up to a light source and compare both sides. Even 1mm difference can cause turning.
Q: What’s the best paper for distance competitions?
A: Lightweight bond paper (16-18 lb) consistently performs best in controlled tests. Avoid construction paper—it’s too heavy.
Q: Can I use tape or staples on paper airplanes?
A: For pure paper purists, no. But for competitions and fun, minimal tape can reinforce critical folds. Check specific competition rules.
Q: How important is throwing technique?
A: Extremely! A poor throw can ruin a perfect design. Practice a smooth, straight-armed motion rather than a wrist flick.
Q: Where can I find paper airplane competitions?
A: Check local science museums, schools, and library programs. The Red Bull Paper Wings world competition happens every few years.
Pro Tips from a Paper Plane Champion
Competition-Winning Advice:
Folding Precision:
- “Use a bone folder for sharper creases”
- “Check symmetry after every major fold”
- “Work on a hard, glass surface
- “Measure critical folds with a ruler”
Launch Mastery:
- “Find the center of gravity for perfect balance”
- “Practice consistent arm motion”
- “Adjust for wind conditions outdoors”
- “Film your throws to analyze technique”
Design Optimization:
- “Test multiple paper weights”
- “Keep a flight log of adjustments”
- “Study real aircraft principles”
- “Iterate based on performance data”
Free Resources & Next Steps
Download Our Free Templates:
- [Printable folding guides for all designs]
- [STEM lesson plans for teachers]
- [Flight data recording sheets]
- [Competition rule templates]
Related Articles to Explore Next:
- [The Science of Flight: Bernoulli’s Principle Explained]
- [10 STEM Activities Using Household Items]
- [How to Host a School Science Fair]
- [Origami Animals: Beginner to Advanced]
Join Our Community:
- Monthly paper airplane challenges
- Live folding workshops
- Expert Q&A sessions
- Sign up for our free newsletter
Conclusion: From Beginner to Paper Plane Pro
Your Success Path:
- Start with the Classic Dart
- Master the distance-focused Glider
- Challenge yourself with advanced designs
- Compete in local events
- Teach others what you’ve learned
Key Takeaways for Perfect Planes:
- ✅ Symmetry is everything – check every fold
- ✅ Paper weight matters – match to your goal
- ✅ Practice your throw – technique counts
- ✅ Adjust and experiment – learn from failures
- ✅ Have fun – it’s about the journey!
Ready to set your first record? Grab some paper and start folding! Share your longest flight distance in the comments below.