
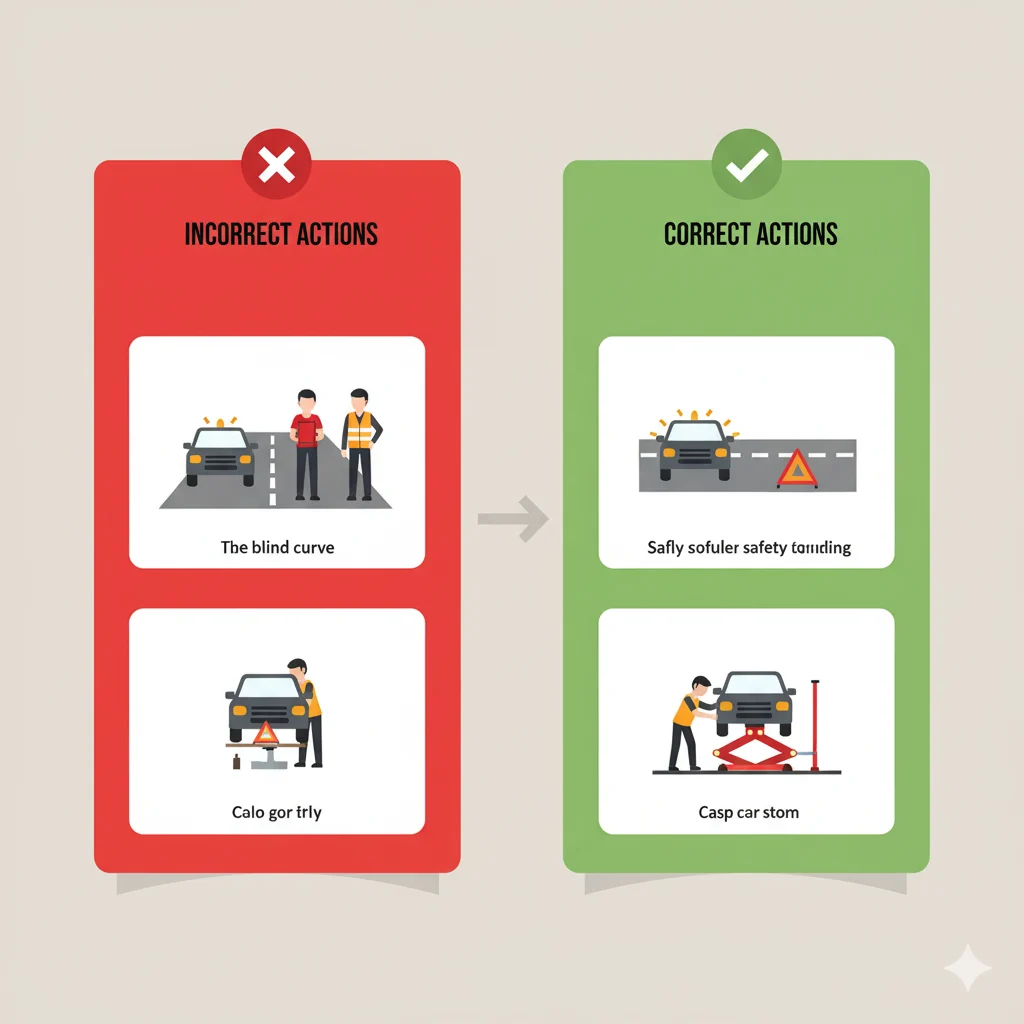
Quick Emergency Action Guide:
- ✅ Pull over to flat, stable ground
- ✅ Turn on hazard lights
- ✅ Apply parking brake
- ❌ Don’t panic – read this guide
That sudden thumping sound and steering wheel pull can make any driver’s heart sink. Whether you’re on your way to work or on a road trip, a flat tire always seems to happen at the worst possible time. But here’s what most people don’t realize: Changing a tire is a simple, mechanical process that requires zero special talent or strength.
This comprehensive guide does more than just show you the basic steps. We provide solutions for common problems like frozen lug nuts, explain what to do if your car doesn’t have a spare, and give you pro tips that make the job easier and safer.
What to Do IMMEDIATELY When You Get a Flat
Your First 5 Minutes Are Critical:
- Don’t Slam Brakes: Gently ease off the accelerator and maintain steering control
- Hold Steering Firmly: The car may pull strongly toward the flat tire
- Find Safe Location: Look for parking lots, wide shoulders, or rest areas
- Avoid Dangerous Spots: Never stop on curves, hills, or narrow bridges
- Activate Safety Lights: Turn on hazard lights, even during daytime
Pro Tip: If you’re in a dangerous area, drive slowly on the flat tire to the nearest safe location. A ruined tire is cheaper than a life.
Essential Tools Checklist: What You REALLY Need
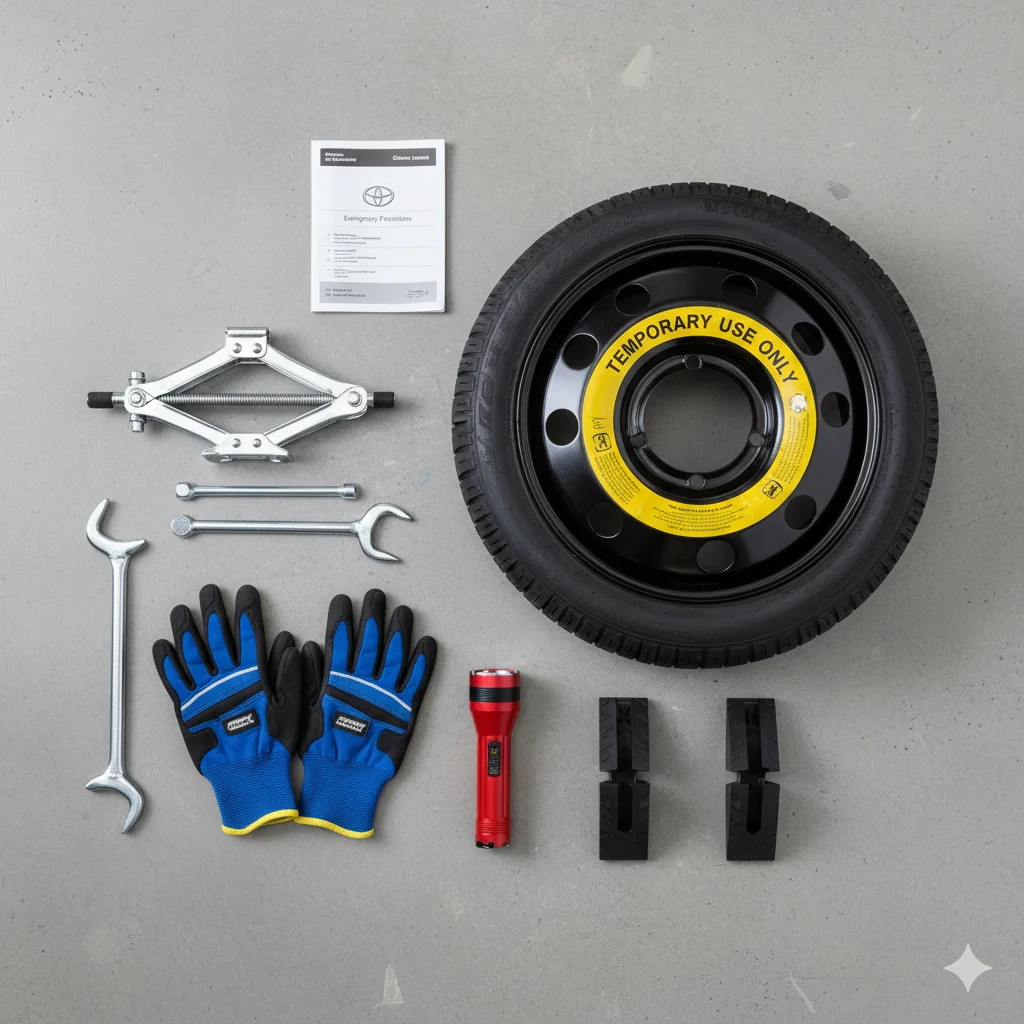
Standard Equipment (Usually in Your Trunk):
- Spare tire (donut) or tire repair kit
- Car jack
- Lug wrench
- Owner’s manual
Highly Recommended Add-Ons:
- Work gloves
- Flashlight or headlamp
- Wheel wedges (or use rocks)
- Rain poncho
- Phone charger
Alt-text: Complete tire changing toolkit showing spare donut tire, scissor jack, lug wrench, work gloves, flashlight, and wheel wedges for safety
The 8-Step Tire Change Process: Never-Fail Method
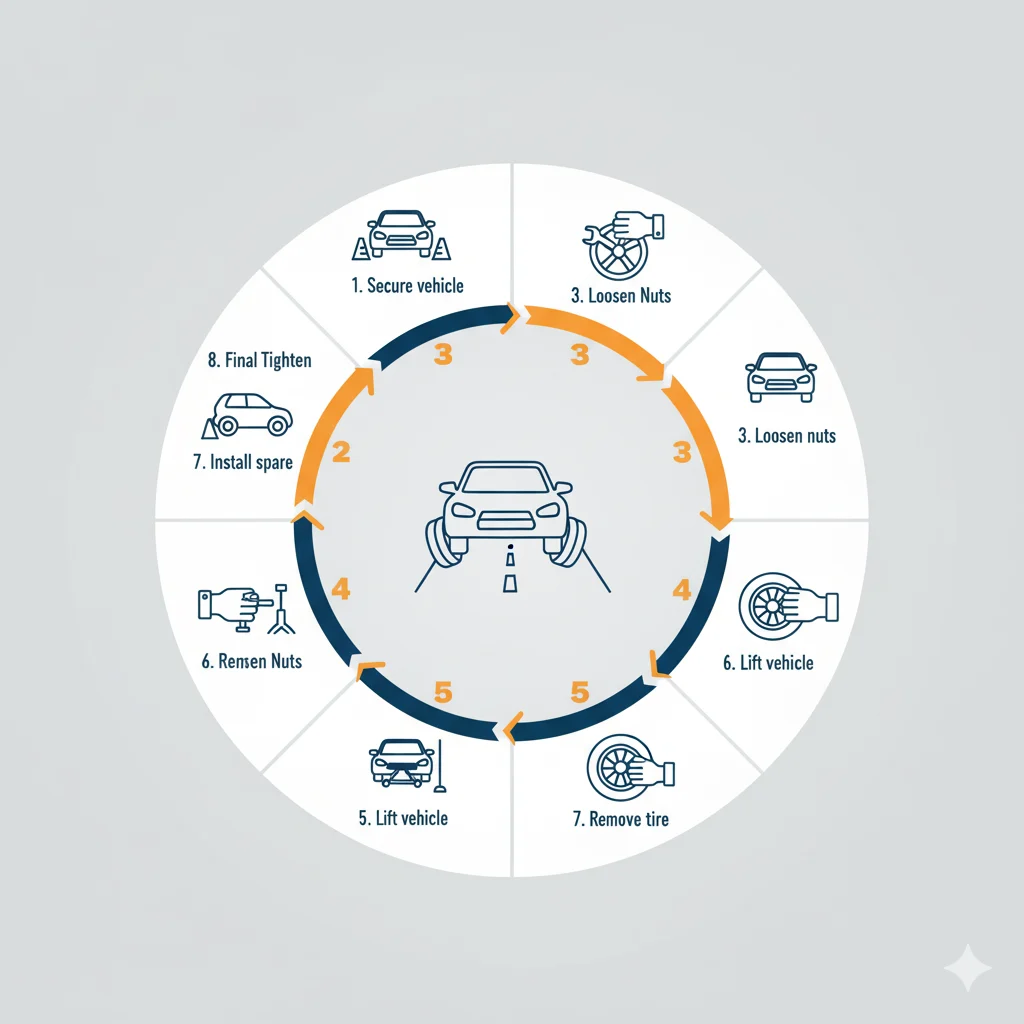
Step 1: Secure the Vehicle Completely
Instructions:
- Park on level ground and turn off engine
- Engage parking brake firmly
- Place wheel wedges against tires on opposite end from flat
- Put automatic transmission in “Park” or manual in first gear
Step 2: Prepare Your Tools and Remove Hubcap
Instructions:
- Remove spare tire, jack, and wrench from trunk
- Check spare tire pressure – if flat, call for help now
- Use flat end of lug wrench to remove hubcap (if equipped)
- Place hubcap upside down to hold lug nuts
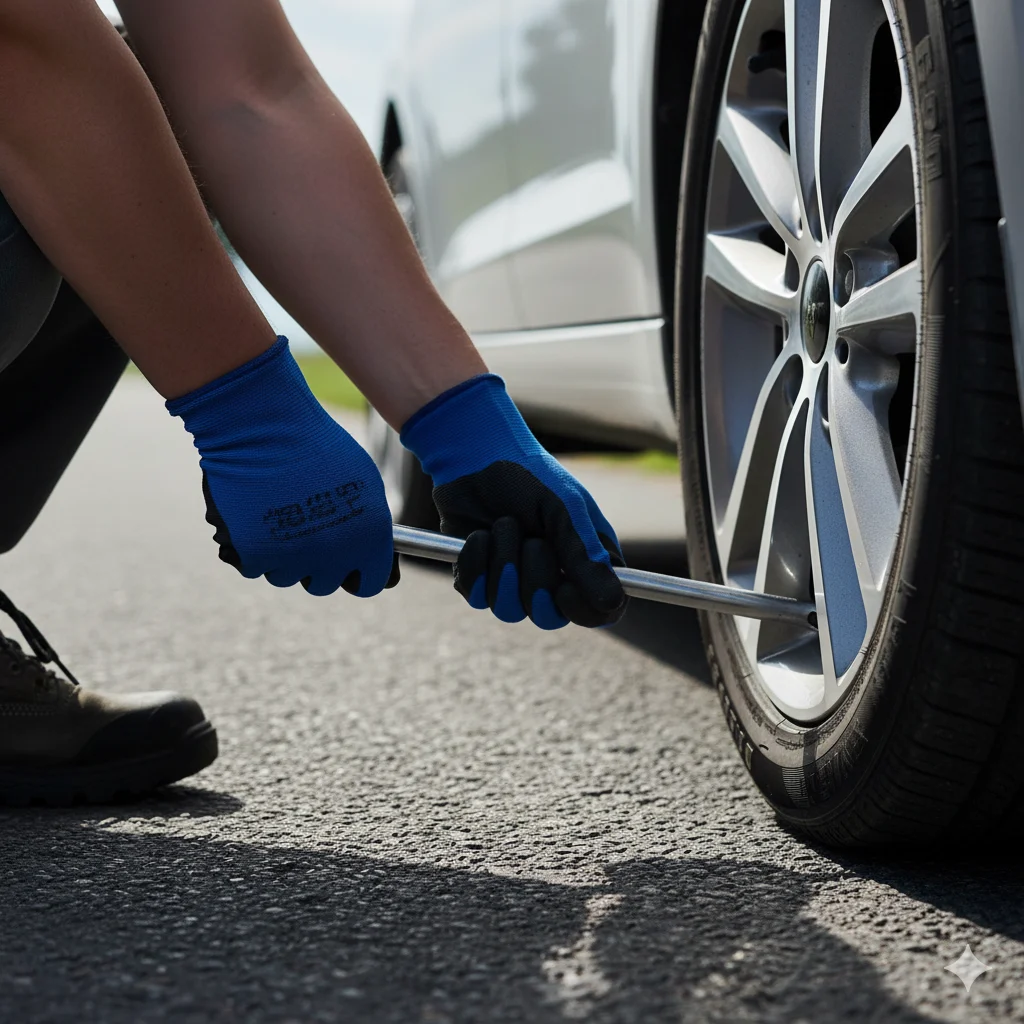
Step 3: Loosen Lug Nuts (Critical Pre-Jack Step)
Instructions:
- DO NOT JACK UP CAR YET – wheel must stay on ground
- Place wrench on first lug nut
- Push counterclockwise with your foot if needed
- Loosen all nuts 1/2 turn – don’t remove completely
Alt-text: Proper technique for loosening stubborn lug nuts using foot pressure on wrench while tire is on ground
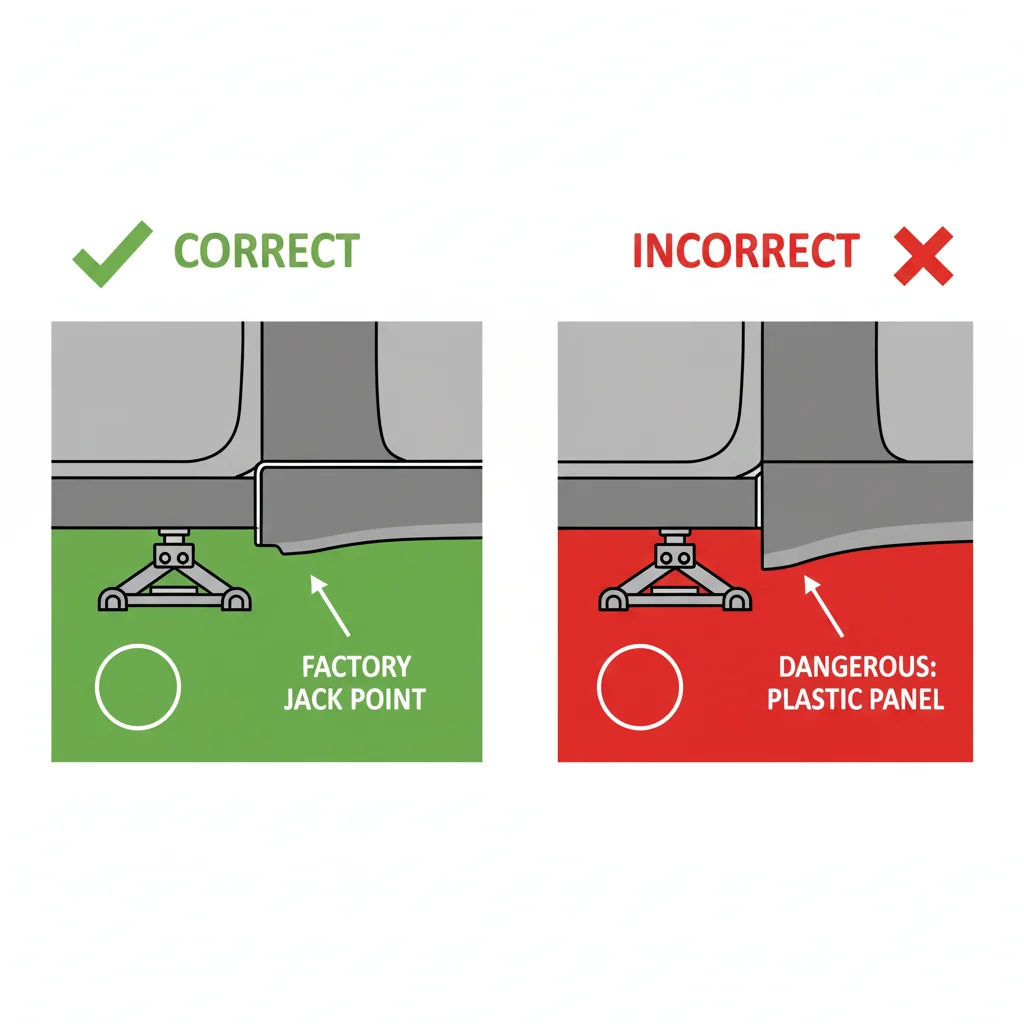
Step 4: Position Jack Correctly (Safety Essential)
Instructions:
- Consult owner’s manual for exact jack points
- Never jack on plastic parts or frame rails
- Ensure jack base is on solid, level ground
- Use board under jack if on soft surface
Step 5: Lift Vehicle Safely
Instructions:
- Lift until flat tire is 6 inches off ground
- Keep all body parts out from under vehicle
- Use jack slowly and watch for stability
- Have flat tire ready to slide under vehicle as safety backup
Step 6: Remove Flat Tire
Instructions:
- Remove loosened lug nuts completely
- Place nuts in hubcap so they don’t roll away
- Pull tire straight toward you off wheel studs
- Immediately slide flat tire under vehicle near jack
Step 7: Install Spare Tire
Instructions:
- Lift spare onto wheel studs
- Push firmly until it seats completely
- Hand-tighten lug nuts in sequence
- Ensure tire spins freely
Step 8: Lower and Final Tightening
Instructions:
- Lower jack until tire touches ground
- Tighten lug nuts in star pattern with wrench
- Lower completely and do final tightening
- Replace hubcap and stow all equipment
*Alt-text: Star pattern diagram showing sequence for tightening lug nuts: 1-3-5-2-4 for even wheel mounting*
Troubleshooting Common Problems
Problem: Lug Nuts Won’t Budge
Solutions in Order:
- Use longer pipe over wrench for leverage
- Spray penetrating oil and wait 10 minutes
- Tap wrench handle with hammer
- Stand on wrench and bounce carefully
- Last resort: Call roadside assistance
Problem: Car Doesn’t Have Spare Tire
Modern Alternatives:
- Tire Inflation Kit: Uses sealant to temporarily plug hole
- Run-Flat Tires: Can drive limited distance on flat
- Emergency Solution: Call for tow immediately
Problem: Jack Won’t Lift or Seems Unstable
Quick Fixes:
- Reposition on proper jack point
- Place solid wood block under base
- Never use bricks or cinder blocks
- If unstable, stop and call for help
Donut Spare Tire: Critical Limitations
You MUST Know These Rules:
- ⚠️ Speed Limit: Never exceed 50 mph
- ⚠️ Distance Limit: Maximum 70 miles
- ⚠️ No Full Size: Smaller than regular tires
- ⚠️ Avoid Highways: Use side roads when possible
- ⚠️ Get Repair ASAP: Visit tire shop within 24 hours
When to Call Professional Help Instead
Call Roadside Assistance If:
- You’re on busy highway or dangerous location
- Spare tire is missing or flat
- Lug nuts are completely stuck
- Vehicle is stuck in mud, snow, or sand
- You have physical limitations
- You feel unsafe at any point
Cost Comparison:
- DIY: $0 (just your time)
- Roadside Assistance: $0-$100 (if you have service)
- Tow Truck: $75-$150
- Tire Shop: $25-$50 mount/balance
Free Download: Emergency Tire Change Kit
Download Our Printable Resources:
- Quick-step emergency guide
- Vehicle-specific jack point diagram
- Roadside assistance contact sheet
- Tire pressure maintenance chart
[Download Your Free Tire Change Emergency Kit]
Final Safety Checklist Before Driving
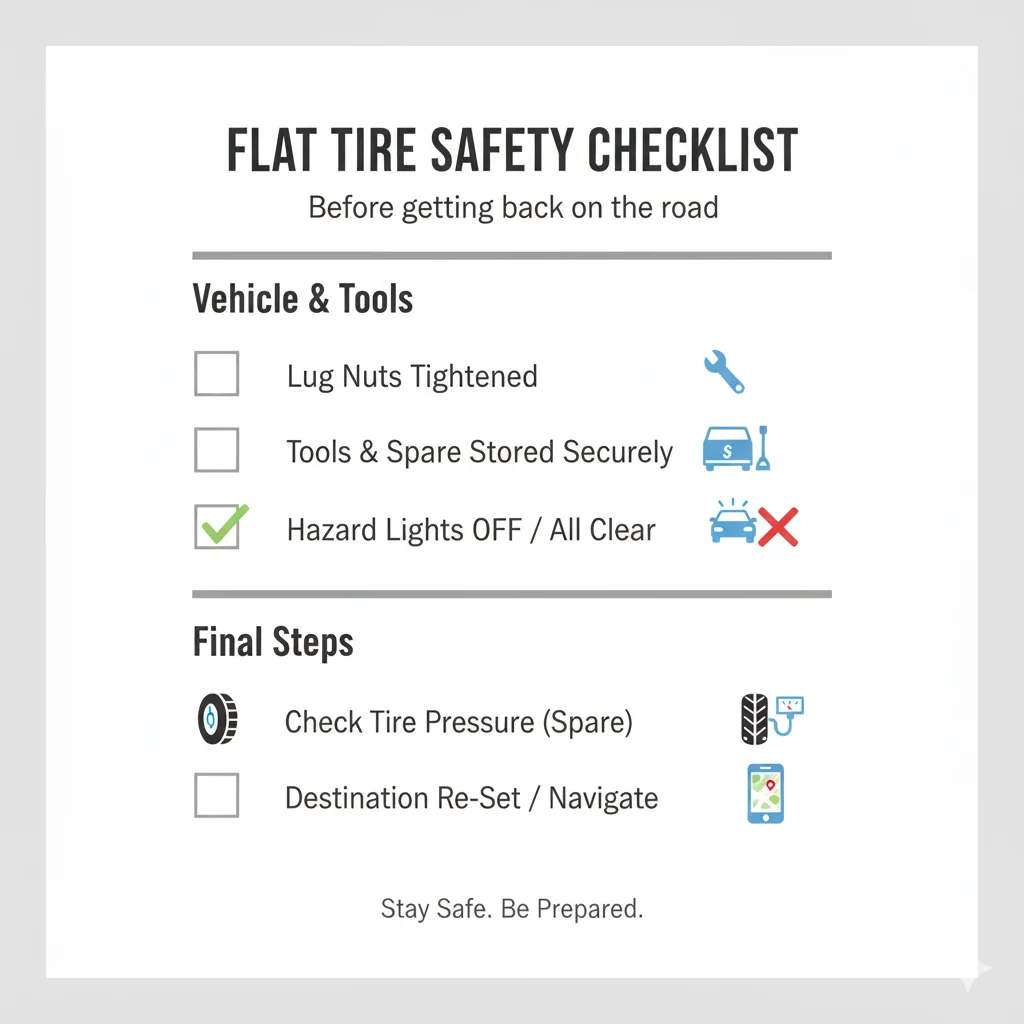
✅ Lug nuts properly tightened in star pattern
✅ Jack and tools securely stored in trunk
✅ Flat tire secured in vehicle
✅ Hazard lights turned off
✅ Spare tire pressure checked
✅ Destination set for tire repair shop
Conclusion: Be Prepared, Stay Safe
A flat tire doesn’t have to ruin your day. With this knowledge, you can transform a stressful emergency into a manageable inconvenience. Remember that safety always comes first – there’s no shame in calling for help if you feel unsure.
Your Action Plan:
- This Week: Locate your spare tire and tools
- This Month: Practice the steps in your driveway
- Always: Keep your phone charged and know your roadside assistance number
Share Your Experience! Have a tire change story or tip? Help other drivers by sharing in the comments below. For more essential car care knowledge, explore our guides on [how to check tire tread depth] and [building the perfect car emergency kit].

Mariah Cannon is the creative mind behind Pikuplab.com, crafting engaging, high-ranking content with expertise and precision.
With a talent for turning ideas into impactful words, Mariah brings value to every article.